In this guide, I will attempt to make it as easy as possible to
explain how to create a Backup of your DVD movie, This version of the
guide is updated to the latest programs and will guide you from Start to
Finish in one go! using ImTOO and freeware programs! and also
included is Chaptering, do remember MOST of the settings used here are
DEFAULT, I did not make any changes, and if I did have, they are
mentioned in the guide. ( * NOTE:
This Guide is mainly a combination of segments taken from the Complete
DVD Backup Guide v2.6! * )
Backup/Encoding - ImTOO DVD Ripper
Chapters - Chapter-X-Tractor
Authoring - VCDEasy ( & ASPI Layer for your system! - use the search for "WinASPI" or scrool to the bottom of the page!)
This guide
will be divided into the following sections:
Part 2 - Chapters
Part 3 - Authoring
Part 4 - Burning
Part 5 - Troubleshooting
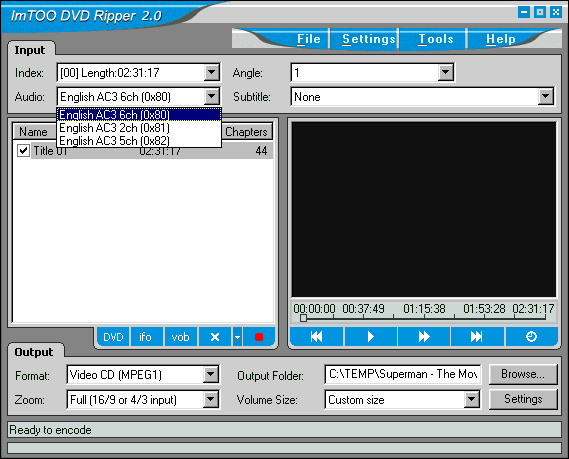
Load your DVD Movie in the DVD drive and use the "DVD" button, this will automaticly select your movie VOB files and scan your Movie, if you want to encode a different segment of your DVD, click either the "IFO" or "VOB" buttons instead. Then click on the "Browse" button next to the "Output Folder" to select where to save the encoded movie.

Step 2 - Select Title
Under the "Input" click on the "Index" and select which Title or Segment you wish to Encode.
NOTE: If you wish to use more Advanced Input Settings, Click Here!

Step 3 - Language Playback
Under the "Input" click on the "Audio" pulldown list, and select the Language for your Movie.
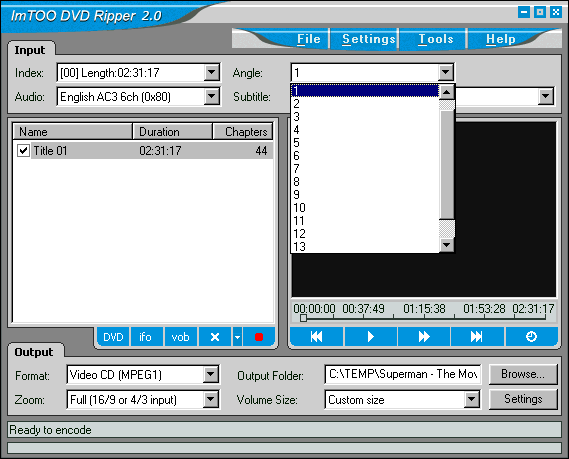
Step 4 - Movie Angle (Optional)
Not all movies give this option, but if your movie does, and you
wish to encode a different Camera Angle then the Default one, just
click on the "Angle" pulldown list, and select the angle of your choice.
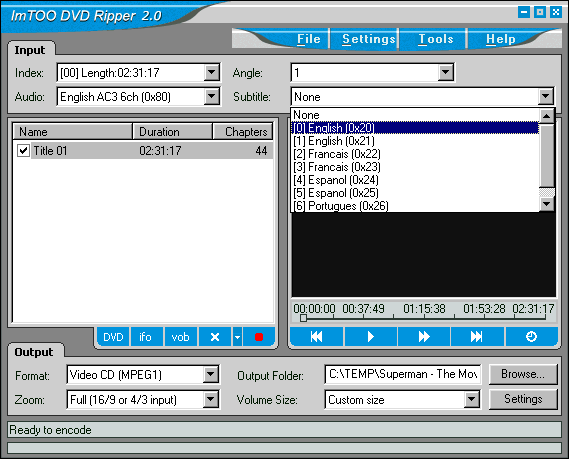
Step 5 - Movie Subtitles (Optional)
If you want your movie to have Subtitles, simple click on the "Subtitle" pulldown list and select. If you do not wish to have Subtitles, simply click on the "None" option instead.
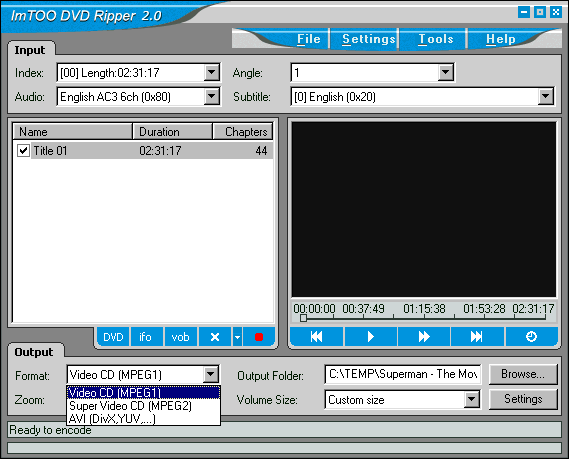
Step 6 - Output Format
Under the "Output" you can select the type of movie to encode, either "Video-CD" or "Super VCD" or even a DivX variation.
NOTE: If you wish to use more Advanced Output Settings, Click Here!
Step 7 - Aspect Ratio
Now you need to select how the movie will be played back on the TV.
If you want to maintain the same Ratio as the Original Movie, simply
select the "Full (16/9 or 4/3 input)"
setting. Use the other settings if you want to convert the movie to a
Full Screen or just Partial. You can also use the Playback option to
test your selection.
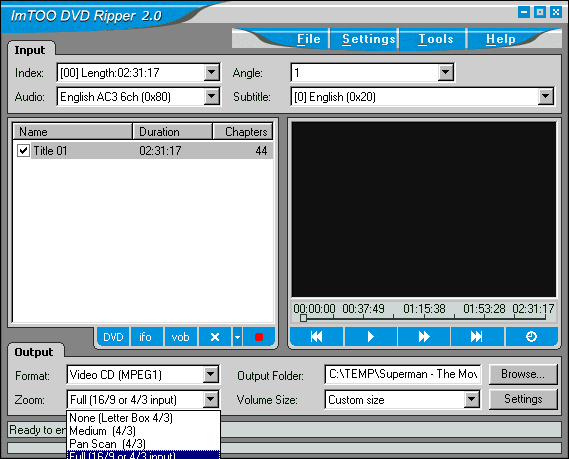
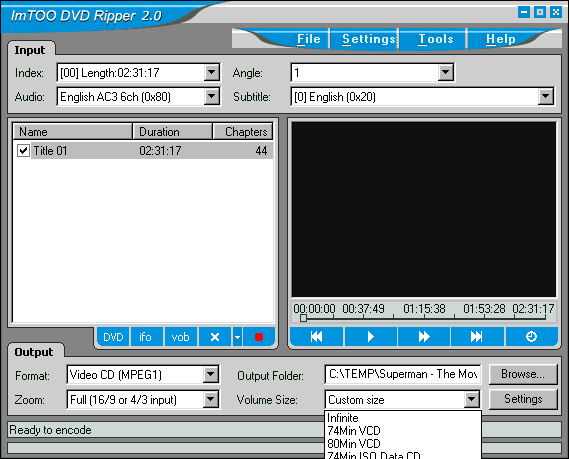
Step 8 - Splitting
Now select if you want to Encode the movie as one file (good for
74/80min movies or 90min if you can use those CDRs) or if your movie is
longer and you need to encode it in several parts. Click on "Volume Size" pulldown list and select how to split, or you can use the "Custom size" to select a specific size to split.
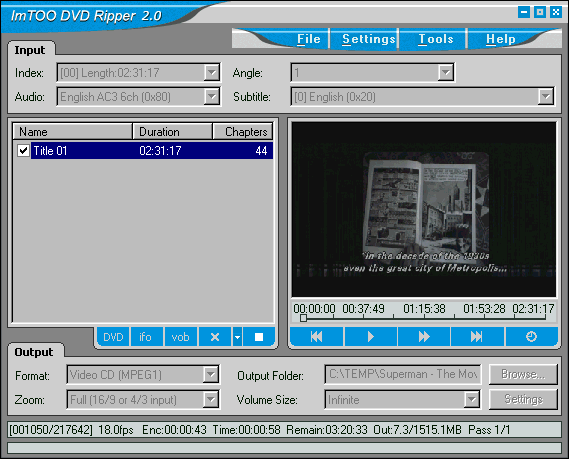
Once you are satisfied with your choices, click on "Record" button and this will begin the Ripping and Encoding of the selected Item(s).

This is an Example of how the Encoding will look like. At the bottom
you can see how fast it will encode, and how long it will take.
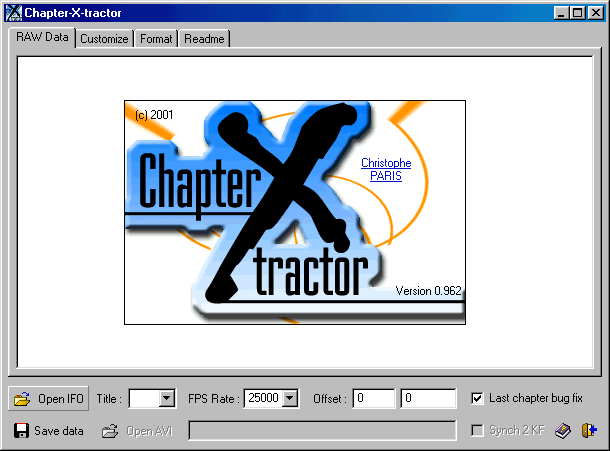
Step 1b - Select the Movie IFO file which you ripped earlier.

Step 2a - You will now see all the information needed in the " RAW Data" field.
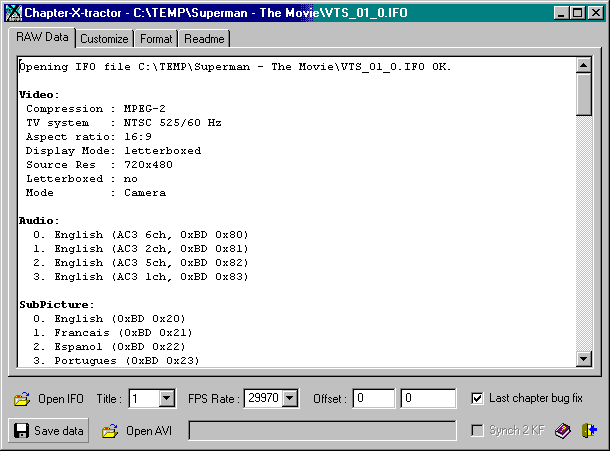
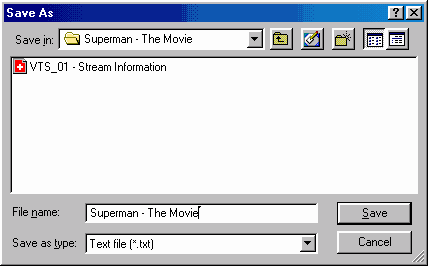
Step 2b - Now Press the "Save data" button, and select a filename for the Chapter Information.
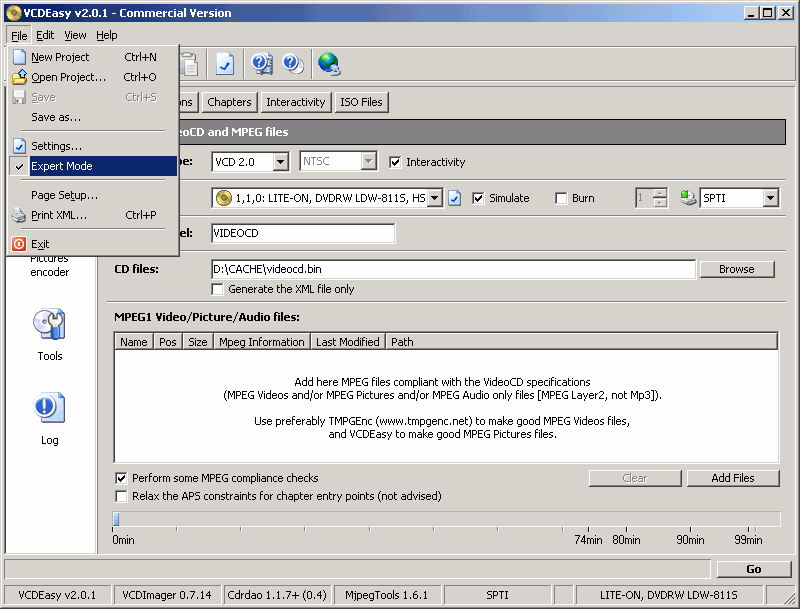
Step 1a
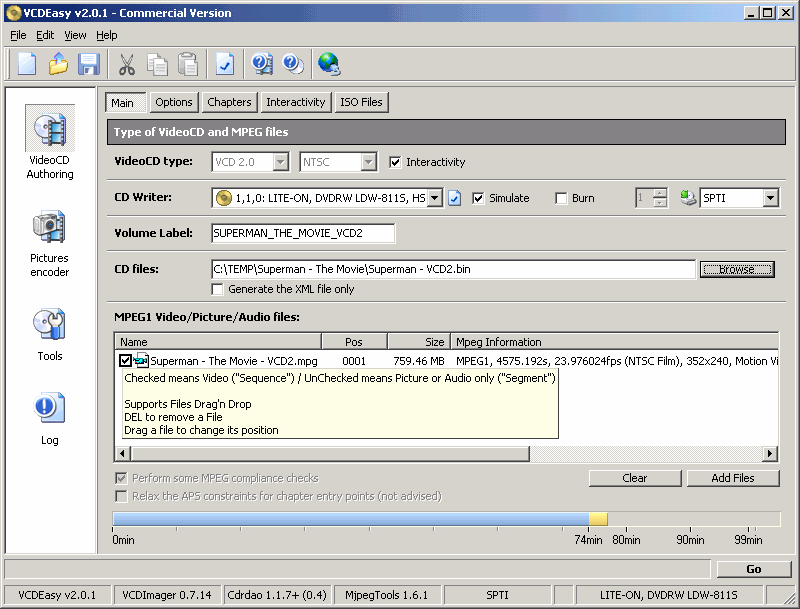
- Open VCDEasy, and set everything according to your specific movie, and
follow the example below.
( * NOTE:
Please do not create blank spaces in the Cue/Bin name, as CDRDao may
have a problem burning it later on.*)
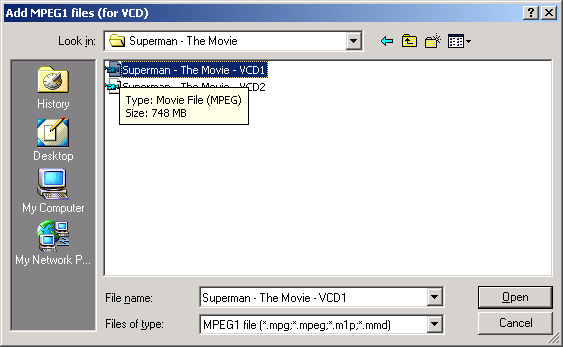
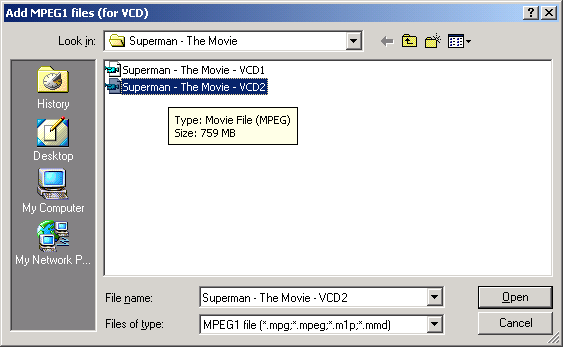
Step 1b - Press the "Add Files" button and select the first of the two files you encoded earlier.
Step 1c - Change the "Volume Label" to reflect the name of the Movie, and also select the "Bin Output File" location.
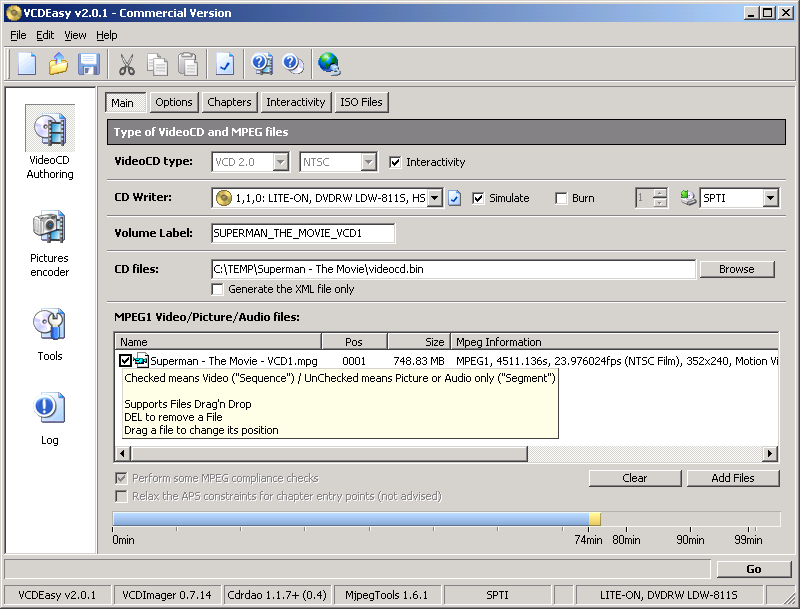
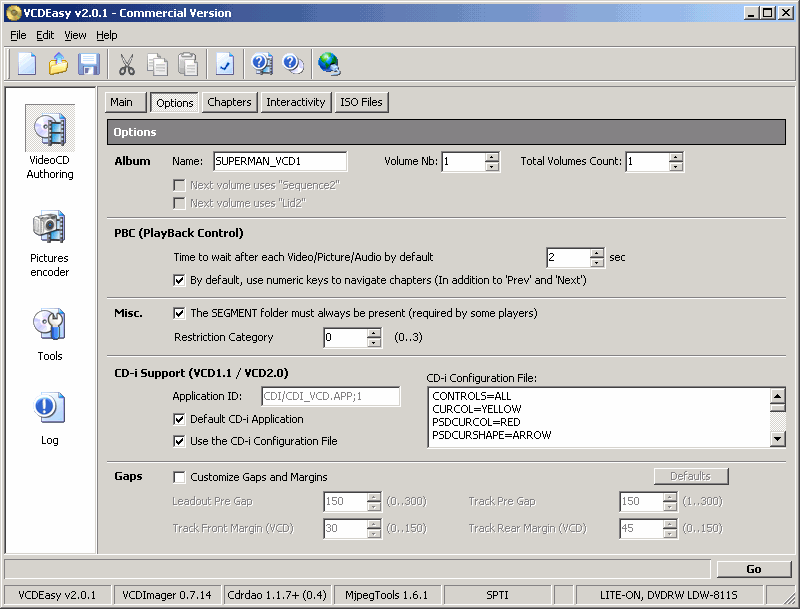
Step 2 - On the "Options" tab you can write down the name of the "Album" and also enable the "Use Playback Control (PBC) ".
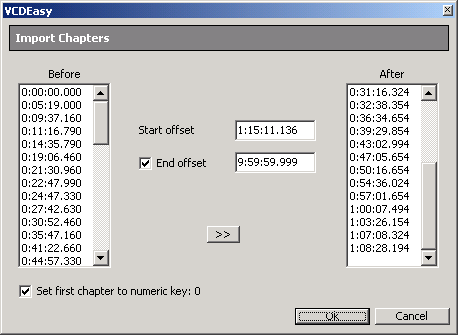
Step 3a - Press the "Chapters" menu item and Here you can select to import the Chapters for your movie, Right Click to get the popup menu so you can import from Smart Ripper or Chapter-X-Tractor.
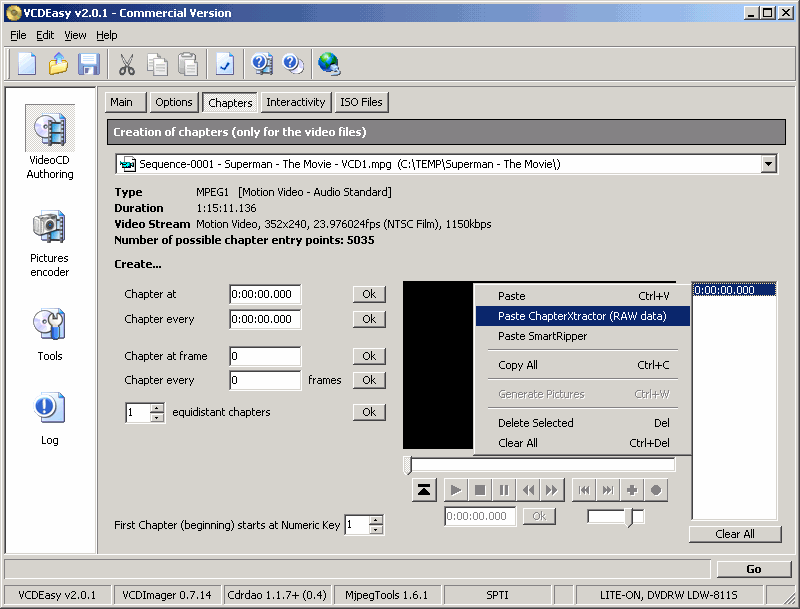
Step 3b - Select the "Start offset" and "End offset " for the first part of the movie and press the "Ok" button.

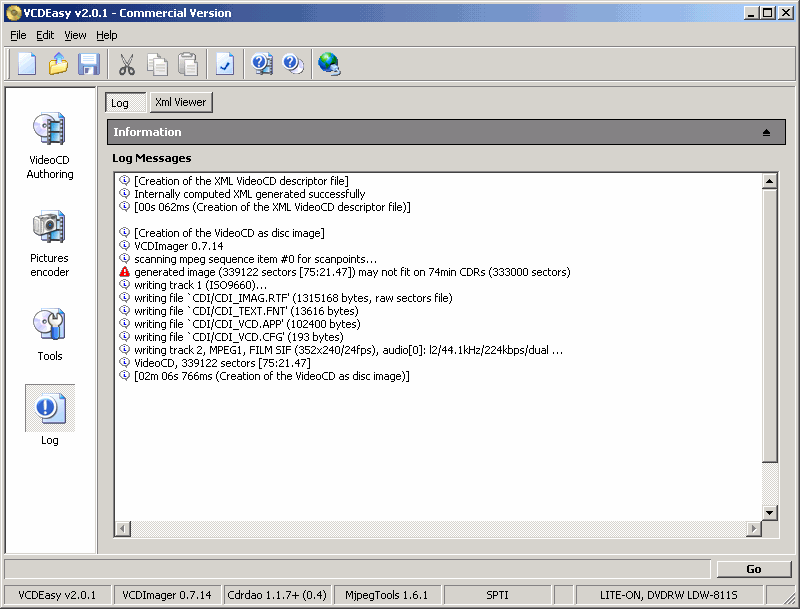
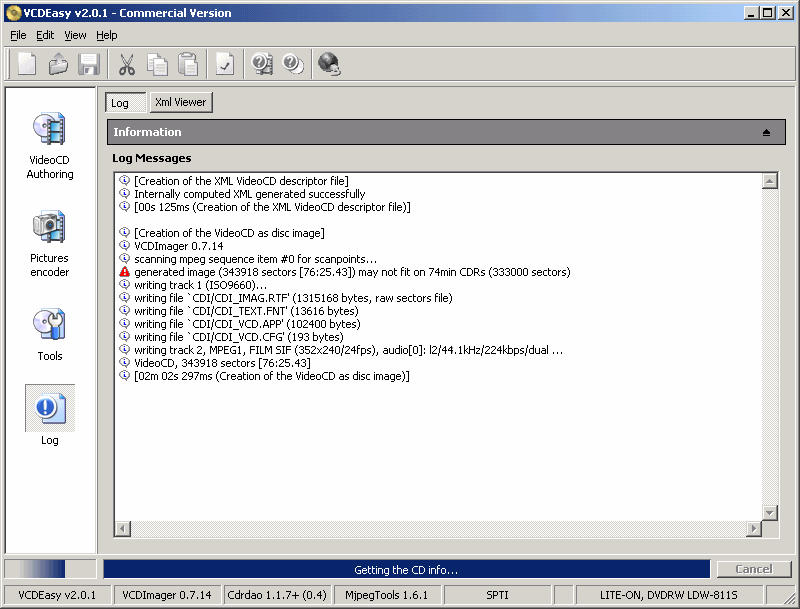
Step 4 - Press the "Go" button, VCDEasy will begin analysing your MPG file and create an Image file for burning.
Step 5b - Change the name of the "Bin Output File", so you don't accidently overwrite the previous file (if you didn't burn it yet).
Step 5c - As in Step 3a and 3b, select the
Chapters for the second part of the movie, make sure to start a
Chapter after the one you last selected on the previous part (3b),
and when you are done press the "Ok" button.
Step 6 - Press the "Go" button again to create the
second image file of the movie.
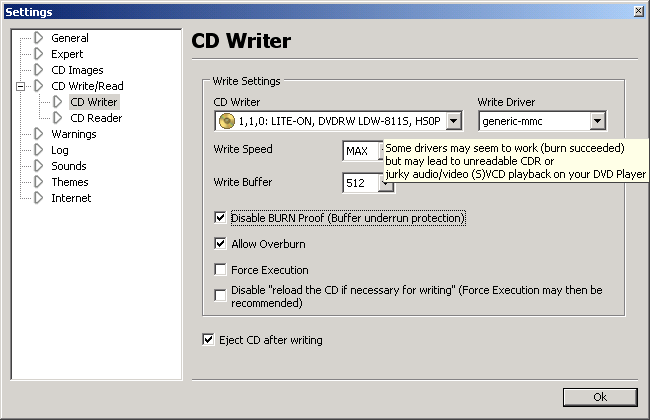
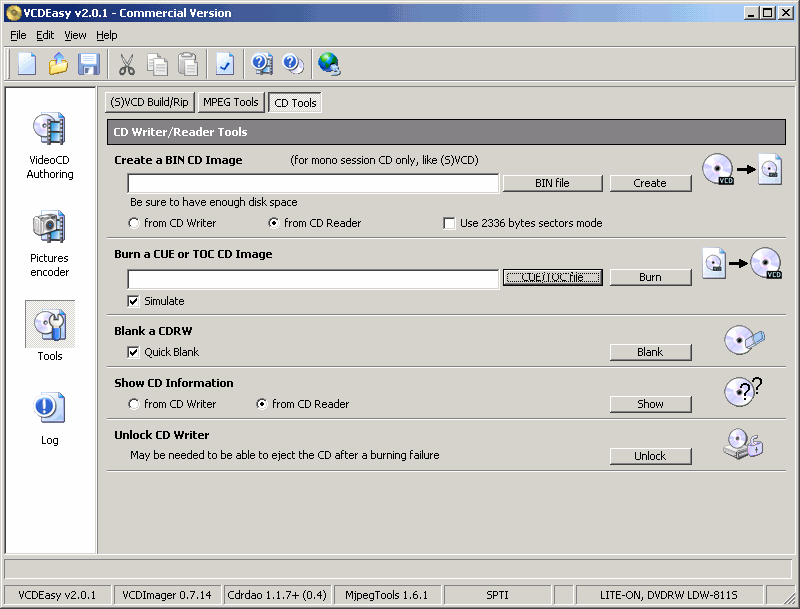
Step 2 - Next, go to the "Tools" section and select "CDRDao
Tools" from the above menu, here you can "Blank a CDRW " and
also select to "Burn a CUE or TOC CD Image" file, you can
also select to "Simulate" and not actually burn. Press
the " CUE/TOC file" button, and then select the Image you want
to burn.
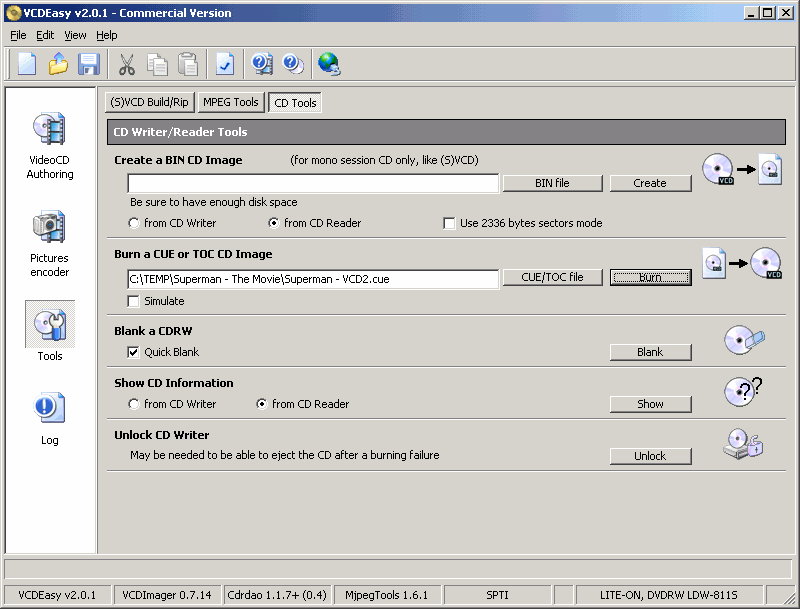
Step 3a - After you selected the first image of the movie (in
this case Superman - VCD1.cue) then press the "Burn"
button and the writing of the CD will start.

Step 3b - When you are done burning the first part select the
second image of the movie (in this case Superman - VCD2.cue)
and again press the "Burn" button and the writing of the CD
will start.
- In some DVD movies the Audio Track is located on the second track, so you might want to try selecting in DVDx - Input Settings to rip the secondary Audio Track, if you are not sure which Audio Track to choose, open the Chapter-X-Tractor text file and you can check in there.
- Make sure when you encode the movie that the correct Settings will be used for your movie, an incorrect Setting will cause A/V sync! and not to mention the resolution will be distorted (if you use PAL on NTSC and NTSC on PAL).
- If you are having problems copying the Movie VOB files to your HDD, I suggest you check your ASPI Layer, the ASPI that comes with Windows9x, Millenium are not good for ripping, update them, and Windows2000/XP does not come with an ASPI Layer at all! make sure you download the latest ASPI for your system, you can get the v4.6 for 98/Me/2000XP here! (scrool to the bottom of the page!)
- DVDx or any other of the DVD Copying programs are unable to access your DVD Movie, try to first play the disc using any Software DVD Player, and then try to run the ripper.
- Because the program always selects the longest running title of the DVD, it might select the wrong title, So make sure the VOB's that were copied are indeed the VOB that belong to the movie itself and not the Extra features (e.g. Pearl Harbor).
- For those who want Subtitles, you can select them under the "Subtitle" in the "Input Settings" window.
Best Regards,
Sefy Levy,
Certified Computer Technician.